CLICK HERE FOR BLOGGER TEMPLATES AND MYSPACE LAYOUTS »

Tuesday, December 23, 2008

Turtle Brownies

DSC00384

There are several things that can make me happy when I bake. They are:

  1. Chocolate
  2. Nutella
  3. Anything with citrus
  4. White Chocolate
  5. Caramel

So, turtle brownies hit on two of my five favorite things!  Yumm.  Never made them, this will be a first.

Letting my mixer do the hard work:

DSC00360

my homemade double boiler - glass bowl on a pan of of hot water:

DSC00361

The batter before it goes into the oven:

DSC00365

My finished brownies before the turtle topping:

DSC00367 

The brownies were easy - now I'm waiting for them to cool and then I'll begin the caramel.  I've made caramel several times in the past, so hopefully it'll be pretty easy!  One of our favorite things to make is caramel popcorn so that's where I first learned to make it.

I took pictures throughout the boiling process showing the browning of my sugar/water mixture:

DSC00368

about 5 minutes into boiling:

DSC00369

about 9 minutes into the boiling process:

DSC00370

at about 10 minutes:

DSC00371

at about 12 minutes, and at this point I took it off the heat.  The color started reaching a nice amber color:

DSC00372

After I added the cream, vanilla, and sugar - LOTS of bubbles:

DSC00373

And I just tossed in the nuts - I ran out of pecans and had to add walnuts to get to the full cup of nuts:

DSC00374

Pouring it over the cooled brownies and beginning to spread:

DSC00375

The final product before I put it in the fridge:

DSC00376

And sweet final goodness:

DSC00388


So, what did I think:  YUMMM!!  These are rich, sweet and insanely addicting.  My only issue is that my brownies sunk a bit in the middle and a lot of the caramel pooled to the center making a thicker caramel layer in the middle.  Not bad, but I wish I could have gotten a more even distribution.  I will definitely make them again BUT not often - just looking at them and I gained a few pounds.  Dangerous!


From: Martha Stewart's Cookies Cookbook

For the batter:

  • 4 tablespoons (1/2 stick) unsalted butter, plus more for the pan
  • 3 ounces good-quality unsweetened chocolate, coarsely chopped.
  • 1/2 cup all-purpose flour
  • 1/4 tsp. baking powder
  • 1/2 tsp. coarse salt
  • 1 cup sugar
  • 2 large eggs
  • 1/4 cup whole milk
  • 1 tsp. pure vanilla extract

For the topping:

  • 1 cup sugar
  • 1/3 cup water
  • 1/3 cup heavy cream
  • 1 tsp. pure vanilla extract
  • 1/2 tsp. coarse salt
  • 1 cup coarsely chopped toasted pecans (about 4 ounces)

1. Preheat oven to 325. Line a buttered 8 inch square baking pan with parchment, allowing a 2-inch overhang.  Butter lining (not overhang).

2. Make batter: Put chocolate and butter in a heatproof bowl set over a pan of simmering water; stir until melted. Let cool slightly. Whisk together flour, baking powder, and salt in another bowl.

3. Put sugar and eggs in the bowl of an electric mixer fitted with the whisk attachment, and beat on medium speed until pale and fluffy, about 4 minutes.  Add chocolate mixture, milk, and vanila, and mix until combined.  Reduce speed to low. Add flour mixture; mix, scraping down sides of bowl as needed, until well combined.

4. Pour batter into prepared dish.  Bake until a cake tester inserted into center of brownies comes out with a few crumbs but is not wet, 27 to 30 minutes.  Let cool on wire rack.

5. Make topping: Bring sugar and the water to a boil in a medium saucepan over medium-high heat, stirring, until sugar has dissolved. When mixture comes to a boil, stop stirring, and wash down sides of pan with a wet pastry brush to prevent crystals from forming. Continue to cook, swirling pan occasionally, until medium amber, 5 to 7 minutes.

6. Remove from heat and immediately add cream, vanilla, and salt.  Gently stir with a wooden spoon or heatproof spatula until smooth. Add pecans; stir until caramel begins to cool and thickens slightly, about 1 minute.

7. Pour caramel over cool brownies; spread with an offset spatula. Refrigerate until cold, 30 minutes to 1 hour.

8. Let brownies stand at room temperature at least 15 minutes before serving. Lift out, and cut into 16 squares, wiping knife with a hot, damp cloth between each cut. Brownies can be refrigerated in an airtight container up to 2 days.

Friday, December 19, 2008

Gingerbread Blondies

Okay...so, I've heard of blondies, but never knew what they were. And to be honest, I'm still not 100% sure.  All I know is that I made them and I'm in love.  Complete head over heels in love.  Once fall hits, I become a gingerbread junkie.  If there is "Gingerbread" in the title, I'm there - first in line - pushing and shoving, there's just no shame in me at times.
So, never having made a blondie -curiosity peaked and a gingerbread blondie at that - it was only a matter of time.  Oh, and did I mention they have white chocolate?  Yes, I nearly swooned reading the title:
Gingerbread-White Chocolate Blondies

DSC00239

Okay - so I'm not ashamed to admit that I was too busy stuffing my face to take pictures.  I kept putting it off and my poor husband had to grab the last blondie and take a picture for me. Yes, quite pathetic, I know.

Anyway - the flavor was out of this world divine.  YUMMMM!  But, getting to the final product was not a pretty picture.  You know you're in trouble when you set off the smoke detector.  Not good.

You see, although Martha Stewart's recipe told me to use a 12x17 baking sheet, I, having so much practice making these (never) and with my perfect track history of producing beautiful final products (umm - yeah right) I thought there was no way that she (yes, she being Martha) could be correct.  So, I used a smaller ribbed cookie sheet because the dough was so thick and was not spreading across the bigger sheet. 

Stupid, stupid, stupid.  LOL -

DSC00152

and from another angle:

DSC00153

Now, I'm not sure if you can see what happened, but let me explain.  The dough expanded.......a lot.  And overflowed.  All over the bottom of the stove.  And the excess burnt - smoked a lot - a whole lot.  And when I opened the oven, the smoke escaped and made friends with the smoke alarm causing a wonderful high pitch toe curling noise.  A noise so loud my two 3 year olds voiced their extreme displeasure until we could pull the battery of our shrill friend.

BUT the flavor was worth it.  Yet again, I lose points in visual appeal, but that's okay - more for me ;)

Martha Stewarts White Chocolate Gingerbread Blondie from Martha Stewarts Cookies cookbook:

  • 2 3/4 cups plus 1 tablespoon all-purpose flour
  • 1 1/4 tsp baking soda
  • 1 1/4 tsp salt
  • 1 1/4 tsp ground cinnamon
  • 1 tsp ground ginger
  • 1/4 tsp ground cloves
  • 1 1/4 cups (2 1/2 sticks) unsalted butter, room temperature
  • 1 1/4 cups packed light brown sugar
  • 1/2 c plus 2 tablespoons granulated sugar
  • 2 large eggs plus 1 egg yolk
  • 1 1/4 tsp pure vanilla extract
  • 1/3 c unsulfured molasses
  • 1 3/4 cups coarsely chopped best-quality white chocolate (10 ounces)
  • Nonstick vegetable oil spray

1. Preheat oven to 350. Coat a 12 x 17 inch rimmed baking sheet with nonstick spray and line the bottom with parchment paper. Spray the parchment and set aside.

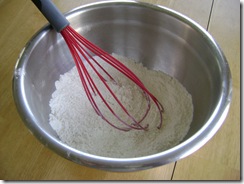
2. Whisk together flour, soda, salt and spices in a bowl.

3. In the bowl of an electric mixer fitted with the paddle attachment, beat butter and sugars on medium-high speed until creamy and pale, about 3 minutes.  Add eggs and yolk one at a time, scraping down sides of bowl as needed.  Add vanilla and molasses and mix on medium speed until combined.  Add flour mixture on low speed until combined.  Stir in white chocolate.

4. Spread batter evenly into prepared pan and bake until golden on edges, about 25 minutes.  Let cool completely in pan; cut into 2-inch squares.  Blondies can be stored in airtight containers at room temperature up to 1 week.

Tuesday, December 16, 2008

TWD Buttery Jam Cookies

DSC00350


Another hesitant recipe - almost skipped it, but then would have felt bad because at least last week, I had a really good reason - the stomach flu made the rounds. 

So, pushing out of my chocolate comfort zone I braved the newest TWD recipe knowing full well my family is a firm believer the less ginger the better.

I followed the recipe exactly except I used strawberry jam instead of the suggested apricot. 

DSC00342

The verdict: YUMM!  BUT there's no way in this world I could get 70 cookies from this recipe - not like we need 70 cookies anyway!

BTW - I received a great package from my TWD swap partner!  HOW FUN!!!  It's so nice to get mail, fun mail - not bills. I can't wait to try the recipe she sent me.

DSC00345

Tuesday, December 2, 2008

Linzer Sables

DSC00126

Here's the link for our chosen recipe:  Living the Life

And here's the second recipe in a row I would not have tried had I not been part of TWD!

I'm very excited to try these!  My dough is in the fridge, but I'm slightly concerned that even in the furthest stretches of my imagination I'm never going to be able to get 50 single cookies or 25 sandwich cookies from my rolled out dough.  Nope.  I have two of this size dough rolled out.  Granted, I was able to roll out another dough with all the leftovers but I could only make 25 cookies or 12 sandwiches.

DSC00110


DSC00115

Obviously I didn't roll them out evenly as the tips on my stars are burnt, but not too bad. I tried to keep a holiday theme since we're in December. :)

DSC00116 

So, because we are Nutella freaks, I, of course, filled our sandwiches with Nutella.  For me, they were okay.  I probably won't make them again.  For one, they are very messy and when you bite them they break and make a mess.  The flavor's fine, but for all the extra calories, they're not something worth some extra time at the gym for.  My hubby liked them, probably due to the Nutella ;)

DSC00128

Monday, December 1, 2008

Twofer Pie - TWD

Here is the link for (click the name) La Casserole Carrée who was lucky enough to pick this recipe!

Alrighty...

So, I missed two weeks of TWD...that doesn't mean I didn't bake, but I always forget to take pictures.  So, this time I remembered and maybe this is the week I should have forgotten.

My pie, not so hot.  As of now, it's not done...it's in the oven, but let me point out the error of my ways:

1. I forgot to cover my crust so it wouldn't burn

2. I left it at 450 degrees for longer than 10 minutes.  You see, this happens because I'm so busy cleaning up my mess and I lose track of time.  And yes, I do make a HUGE mess when I cook.  I really do need to learn to clean as I go.

3. Not sure what happened, but my pie overflowed making a big mess (see #2 above).

So, my pie is in the oven at 300 degrees and we are now at 35 minutes and the color leaves a LOT to be desired.  It's dark...much darker than it should be.  So, I'll take some final pictures and post it soon.  Keep your fingers crossed!!DSC01136

Hmmm...yeah, not so pretty.  Well, to be honest, that seems to be the general theme for me...lol.

BUT my crust looked pretty!

DSC01129

The filling also looked nice, oh except when it seeped over the edge...

DSC01135

And an actual slice...

DSC01165


So, moving beyond the lack of visual awe, how did it taste?  This is a pie I NEVER would have made...I do NOT like pecan pie at all, and figured it would be just too sweet.

Not so!  I loved it and the twofer pie had a great flavor of pumpkin and the pecans but neither seemed overpowering.  The general consensus was solid approval.  This just may make it on to my yearly Thanksgiving menu as it was very easy to make, and I'll keep learning from my mistakes (plenty to learn from!).

Monday, November 10, 2008

No TWD

So, this week I passed on the recipe.  I thought we'd get to it, no problem, but all of a sudden it was Monday.  How does that happen???  I mean, for some reason, I lose track of time more on the weekend than during the week...go figure!

So, I'll be back with TWD and rice pudding.  But, I've got to admit, I'm definitely not looking forward to this recipe, but I'm going to make it because the whole point of joining TWD is to expand my horizons and make things I wouldn't normally make if given the choice.

~Steph~

Monday, November 3, 2008

My TWD Rugelach

Okay, besides biscotti, I was most excited to try this recipe!  Why?  Well because my husband is a self proclaimed chocaholic and nearly everything I bake will include some form of chocolate.  Needless to say, Rugelach would have been very low on my baking list had it not been for TWD.

I had to read other people's comments and got some fabulous suggestions, so I made two batches, with two different flavors.

Batch #1 consisted of strawberry jam (all I had on hand), chocolate chips and pecans.

Batch #2 consisted of Nutella, dried cranberries and pecans.

Impressions: Batch #2 with the Nutella was excellent.  I'd want to try it with dried cherries and almonds next time.  My oldest daughter preferred batch #1.  I really enjoyed them and would like to try them again with apricot jam, golden raisins and almonds. 

They were easy to make and we'll definitely be making them again, they were super easy!!

THE DOUGH:

DSC01092

BATCH #2 - I cut first and then spread on the filling.

DSC01095


BEFORE THEY WENT INTO THE OVEN:

DSC01093

MY FINAL PRODUCT - NOT SO BAD...APPEARANCE IS BETTER HERE!!

DSC01100

Chocolate Cherry Cupcakes

Okay, before I post my photo, I have to be up front.  Visually appealing food and I, we're more like oil and water.  We have yet to find a way to co-exist as happy partners.  Someday, with lots of love and lots of practice, I believe we'll make it. 

But, for now, my family understands that my food isn't always nice to look at and sometimes can be downright disgusting. As my eloquent pointed out immediately after spying my freshly decorated cupcakes, "Eww, that looks like dog poo." Yes, sweetheart, thank you for that visual as I take my fist bite. 

DSC00901

And from a different angle:

DSC00900


Maybe it's just the photographer.  Well, unfortunately that would be me, again, on my shoulders.  But, alas, as soon as I get my new camera, I'll be cleaning up my photography skills as well. 

So, besides the less than stellar appearance, how do my chocolate cherry cupcake taste?  OMG, they are the best friggin cupcakes I've ever made, and my homemade chocolate fudge frosting, EVEN BETTER.  I hate homemade frosting that tastes like powdered sugar, and this is the only one I've ever made that turned out divine! 

A couple notes on my changes:

  • I had to use the cranberry juice cocktail
  • In the frosting, I didn't have chocolate cream liqueur so I made a small amount of ganache instead. 
  • My husband HATES coffee, but I used it anyway, and it can't be tasted at ALL.  But I'd love to know why there's the addition of coffee?  Definitely curious!!

Both recipes come from 125 Best Cupcake Recipes by Julie Hasson

Chocolate Cherry Cupcakes:

  • 1 1/2 C all purpose flour
  • 1/2 C unsweetened Dutch-process cocoa powder, sifted
  • 1/2 tsp baking soda
  • pinch salt
  • 1 C granulated sugar
  • 1/2 C vegetable oil
  • 1 C canned cherry pie filling
  • 1/2 tsp vanilla
  • 1/2 tsp almond extract
  • 1/2 C cherry juice or cranberry juice cocktail
  • 2 tbsp balsamic vinegar

1. In a small bowl, mix together flour, cocoa powder, baking soda and salt.

2. In a large bowl, whisk together sugar an doil.  Mix in cherry pie filling, vanilla and almond extract.  Alternately whisk in flour mixture and cherry juice making three additions of flour mixture and two of juice, beating until batter is smooth.  Mix in vinegar.

3. Scoop batter into prepared pan.  Bake in preheated oven for 22 to 25 minutes or until tops of cupcakes spring back when lightly touched.  Let cool in pan on rack for 10 minutes.  Remove from pan and let cool completely on rack.  Top cooled cupcakes with frosting.

Chocolate Fudge Frosting

  • 1 1/2 confectioner's (icing) sugar
  • 3/4 C unsweetened Dutch-process cocoa powder, sifted
  • 1/2 C unsalted butter, at room temperature
  • 2 tbsp chocolate cream liqueur
  • 1 tbsp strong brewed coffee
  • pinch salt

1. In a food processor fitted with a metal blade, process confectioner's sugar, cocoa powder, butter, chocolate liqueur, coffee and salt until smooth, scraping down sides as necessary.

2. Spread frosting on cooled cupcakes.

Wednesday, October 22, 2008

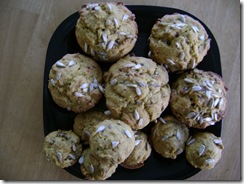
Pumpkin Muffins

DSC01062


Sometimes the planets align and something I bake turns out, not just in flavor, but in appearance as well.  If you've read my past posts, you'll see that my food appearance leaves much to be desired.  Much.

My pumpkin muffins were well received.  The golden raisins were the key.  I would add more next time, and another blogger (I'm sorry, I can't remember who at the moment) drizzled chocolate over the tops.  I'm so there next time! 

The only thing I noticed is that this made 12 muffins, but I had more dough leftover so I made mini muffins for the kids. 


Whisking the dry ingredients

DSC01053


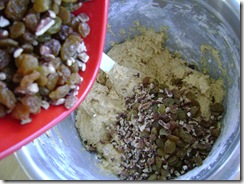
The raisins and pecans - definitely more golden raisins next time.

DSC01056

Add them in at the end

DSC01059


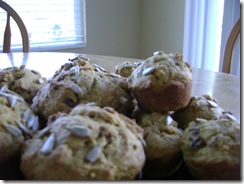
Bake - and ta da:

DSC01064

Tuesday, October 14, 2008

My 1st TWD - Almond Biscotti


DSC01043

Well, I've been busy baking, but haven't posted much as of late.  I'll try to get everything up in the next few weeks. 

I love the idea of baking with the same thing as everyone else, especially since I have so many baking disasters.  Maybe this way I can find out where I go so abysmally wrong sometimes and maybe I can actually fix my mistakes!  Hallelujah!!

So, this week, my first week was with Almond Biscotti.  I've been DYING to try Biscotti, ever since I saw Giada make it one day and realized it didn't look too hard.  What a perfect opportunity.

So, I finally got to it on Monday, at the last moment and even though I had read over the recipe a handful of times, I apparently wasn't paying attention to what I read.

Ahh, in the very first step...add baking powder.  Shoot.  I just ran out making a cake and forgot to pick some up at the store.  After a moment of internet research, I found that I could mix Cream of Tarter and Baking Soda at a 2:1 ratio to get the same thing.  Awesome, I'm back in it.

Made my dough went to add my almonds...obviously I didn't look at the bag REAL close because what I thought were almonds were actually pecans.  A bit late now.  What the heck, I crushed them a bit and added them instead.

Other than those two adjustments I followed the recipe exactly.  My first baking time could have been increased about 5 minutes because I had a hard time transferring one of my logs to a cutting board.  I had no problems with the other log.  My second cooking time followed along with what Dorie suggested.

So, how did they turn out?  Hmmm...flavor a 10.  They are a universal hit in our house and that says a lot, especially since there's not even a hint of chocolate in them!

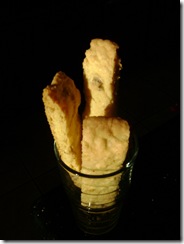
Appearance - this is my major issue in the baking world.  My baked goods do not appear as they should and no amount of squinting can make it better.  My biscotti were too thick, I will cut them thinner next time for sure.  Not only that, they were a bit flat.  Not real 'biscotti' looking, more like a shortbread cooking look going on here.

Final Result -  Will become a regular in my house.  There are so many ways to fix them up and they go great with coffee, tea, hot chocolate...

Monday, September 15, 2008

Chewy Molasses Crinkles

Here we go again...another weekend, another recipe.  Such hope for perfection....

Dan was craving Molasses cookies and I had seen one in Martha Stewart's Cookies cookbook.  So, of course, after my last cookie mishap, I decided to give it a shot:

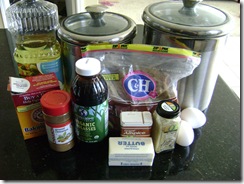
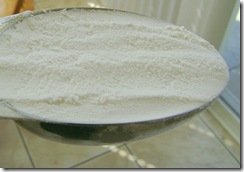
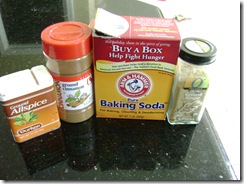
Here is what we need:

DSC00906

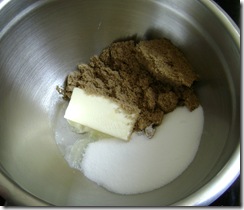
Next, put butter, brown sugar, and 1/2 c granulated sugar in bowl of an electric mixer fitted with the paddle attachment.  Mix on medium speed until smooth, about 3 minutes.

DSC00908

Mix in eggs one at a time, followed by the molasses and oil.

DSC00910

DSC00909

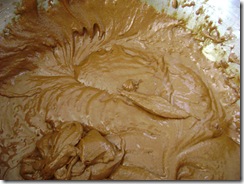
Reduce speed to low; gradually mix in flour, baking soda, cinnamon, ginger, allspice, and salt:

DSC00911

DSC00912

Cover dough with plastic wrap; refrigerate until firm, about 1 hour or overnight:

DSC00913

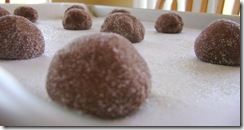
Preheat oven to 325 F.  Put remaining 1/4 c granulated sugar in a bowl.  Using a 1 3/4 inch ice cream scoop, form balls of dough.  Roll balls in sugar to coat, and space 3 inches apart on baking sheets lined with parchment paper.

DSC00917

Bake, rotating sheets halfway through, until cookies are flat and centers are set, about 17 minutes.  Let cool completely on sheets on wire racks.

And now, here is my final product:

DSC00918

DSC00919


Sigh....yes, they went flat, just like my other cookies.  The only thing mistake I can think of is that I over mix my batter and deflate my poor cookies.  They taste fantastic, they do pass the taste test, but still, I'm failing miserably at presentation.  So, Martha may send me an email some day forbidding me to ever use her cookbook again.  I can't say I blame her...


Recipe (Martha Stewart's Cookies pg. 83):

  • 1/2 C unsalted butter, room temperature
  • 1C packed light brown sugar
  • 2 large eggs
  • 1/2 C granulated sugar, plus 1/4C for rolling
  • 1/2 C unsulfured molasses
  • 2 Tablespoons vegetable oil
  • 2 C All purpose flour
  • 1 tsp. baking soda
  • 1 tsp. ground cinnamon
  • 1 tsp. ground ginger
  • 1 tsp. allspice
  • 1/2 tsp. coarse salt

1. Put butter, brown sugar, and 1/2 c granulated sugar in bowl of an electric mixer fitted with the paddle attachment.  Mix on medium speed until smooth, about 3 minutes.  Mix in eggs one at a time, followed by the molasses and oil.

2.  Reduce speed to low; gradually mix in flour, baking soda, cinnamon, ginger, allspice, and salt.  Cover dough with plastic wrap; refrigerate until firm, about 1 hour or overnight.

3.  Preheat oven to 325 F.  Put remaining 1/4 c granulated sugar in a bowl.  Using a 1 3/4 inch ice cream scoop, form balls of dough.  Roll balls in sugar to coat, and space 3 inches apart on baking sheets lined with parchment paper.  Bake, rotating sheets halfway through, until cookies are flat and centers are set, about 17 minutes.  Let cool completely on sheets on wire racks.  Cookies can be stored between layers of parchment in airtight containers at room temperature up to 5 days.