
Danny and I stayed home and had a quiet New Year's Eve. Not wanting to sit around doing nothing, we decided to bake. Yep, my hubby likes to bake with me which, when he has time, is a lot of fun.
We decided to make one of his favorites, cream puffs - mainly because we didn't have to go to the store.
Using my new cookbook from Christmas - Martha Stewart's cooking School, we got to work.
First we made the pastry cream:
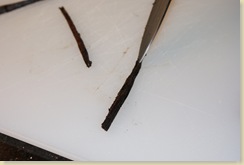
Our vanilla bean:
The pastry cream before it gets covered and goes in the fridge:

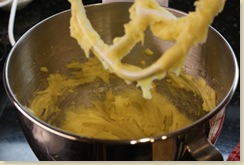
While the cream sits in the fridge for 2 hours, we started on the dough:
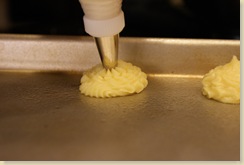
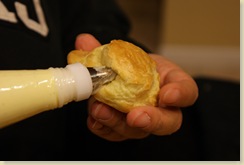
So, after we make the dough, we are supposed to pipe the dough onto baking sheets. We've never used piping bags before and we made a very rookie mistake - an overfilled pastry bag. Oops:

This mistake made for a very difficult piping process, but hubby did pretty good!

Next, we use our fingers to put on an egg wash before we slide them into a 400 degree oven.
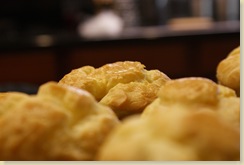
After sitting in the oven for about 12 minutes, decrease the temperature to 350 for another 20 minutes until golden.


After the puffs cool and the pastry cream sits for two hours it's time to whip heavy cream and fold it into the pastry cream. Fill another pastry bag and pipe the filling into the puffs.
We made a chocolate glaze and dipped the cream puffs...but our chocolate was a bit grainy for some reason. I don't think we let the the sugar mixture come to a full boil, but we dipped half into chocolate and just dusted the other half with powdered sugar.

All in all, it was a long time consuming process. Each individual step was pretty easy but stringing them all together our cream puffs took over two hours to cook. They're not my favorite desert in general but these turned out good. The pastry cream was excellent and can be used in so many different things. Danny loved them and said they were excellent.
Recipe from Martha Stewart's Cooking School
Cream Puffs -
- 1 cup water, plus more as needed
- 1/2 cup (1 stick) unsalted butter
- 1 tsp granulated sugar
- 1 cup all-purpose flour
- 4-5 large eggs
- For puffs
- 1 large egg
- 1 tablespoon water
- sunflower or other neutral tasting oil, for plastic wrap
- 1/3 heavy cream
- 1 recipe pastry cream
Heat oven to 400 degrees with a rack in the center. Line two baking sheets with nonstick baking mats.
Combine the water, butter, sugar, and salt in a medium saucepan over medium-high heat. Bring to a boil, and immediately remove from heat. Using a wooden spoon, stir in the flour. When flour is combined, return to heat. Dry the mixture by stirring constantly over heat until it pulls away from the sides and a film forms on the bottom of the pan, about 4 minutes. Transfer mixture to the bowl of an electric mixer fitted with the paddle attachment, and mix on low speed, about 2 minutes, until slightly cooled. Add 4 eggs, one at a time, on medium speed, letting each one incorporate completely before adding the next. Test the batter by touching it with a flexible spatula or your finger, then lifting; it should form a string. If a string does not form, lightly beat the last egg and add it, a teaspoon at a time, until the batter is smooth and shiny. If you have added all the egg and the batter still doesn't form a string, add water, 1 teaspoon at a time, until it does.
Fill a pastry bag fitted with a plain round 3/4-inch tip with the dough and pipe 1 1/2-inch rounds (3/4 inch high) onto baking sheets. Beat together egg and the water; use your finger to rub egg wash over entire surface, being careful not to let it drip onto the baking sheet (it will inhibit rising), and flatten tips.
Cover one sheet with lightly oiled plastic wrap, and place in refrigerator. Bake the other sheet 15 minutes; reduce oven heat to 350 degrees. Bake another 20 minutes more, or until puffs are golden brown. Transfer to a wire rack to let cool coompletely. Return oven heat to 400 degrees and repeat process for remaining batch.
Whip heavy cream to medium peaks in a small bowl. Stir pastry cream to soften. Add whipped cream to pastry cream in two batches, folding to combine after each. Fill a pastry bag fitted with a coupler and plain round tip. Insert tip into the underside of each cream puff, and fill. Cool completely before dusting with confectioners' sugar or dipping tops in glaze, as desired.
Pastry Cream -
- 2 cups whole milk
- 1/2 cup sugar
- 1/2 vanilla bean,
- 3 large egg yolks
- 3 tablespoons plus 1 1/2 tsp. cornstarch
- 2 tablespoons unsalted butter
Bring milk, 1/4 cup sugar, vanilla seeds, and salt to a simmer in a saucepan over medium heat, whisking to disperse seeds.
Whisk egg yolks and remaining 1/4 cup sugar in a medium bowl. Whisk in cornstarch, 1 tablespoon at a time. Ladle 1/2 cup hot-milk mixture into yolk mixture, whisking. Add remaining milk mixture, 1/2 cup at a time. Pour mixture into pan, and heat over medium-high, whisking constantly, until mixture comes to a full boil and is thick enough to hold its shap when lifted with a spoon, about 2 minutes. Stir in butter and vanilla.
Remove from heat and pour mixture into a bowl; place plastic wrap directly on surface to prevent a skin from forming. Refrigerate until cold, at least 2 hours (or up to 2 days).


